Repair/Overhaul of PowerMac G5 Liquid Cooling System and CPU Boards
2.7 GHz Dual-CPU G5 built May 2005 - Delphi LCS
By Bill S.
Posted: July 22, 2010
(This is Page 6 (last page) of the article)
Inspection Nine Months after Original Repairs
42) My computer ran flawlessly for about 6 months after this overhaul; then "Hardware Monitor" began reporting CPU "B" temperature at -39.7°C! I am guessing that my application of thermal grease was excessive, the grease leaked down through the gap in the CPU B plastic shield and bridged components somehow, but this is just speculation. (A sensor could have also failed) No ill effects from this issue; the computer works fine as of July 2010.
43) The coolant label states that it is good for two years; at that time I plan to re-flush it. Hopefully the Viton O-rings have cured the "white rice" problem, but as Mike has written, the computer should periodically be checked for leaks.
44) Pulled the CPU/LCS assembly out today (July 2, 2010) to have another look. Figure 41 is a photo with the "G5" heat shield off. No indication of a leak here.
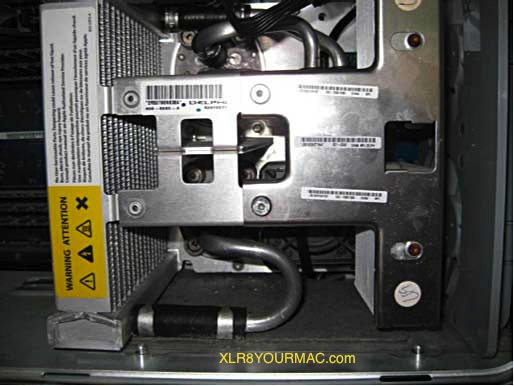
Figure 41. CPU/LCS Assembly 7/2/2010
45) Removed the CPU/LCS Assembly; see Figure 42. One of the standoffs holding the assembly in the computer did not retract when screw was loosened. Probably was deformed "open" by too much torque when reinstalled in October 2009. An awkward thing to fix. Be careful not to tighten those eight screws too much when reinstalling! Still no sign of a leak.
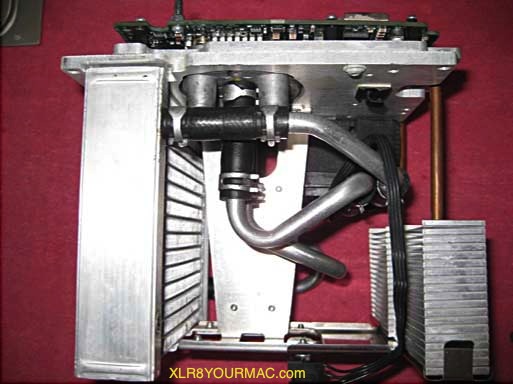
Figure 42. CPU/LCS Removed 7/2/2010
46) Figure 43 is a photo of the G5 interior after removing the CPU/LCS assembly. Dark patch on floor pad is the result of attempting to add coolant to the radiator before pulling LCS out... slight spill, not from leakage.
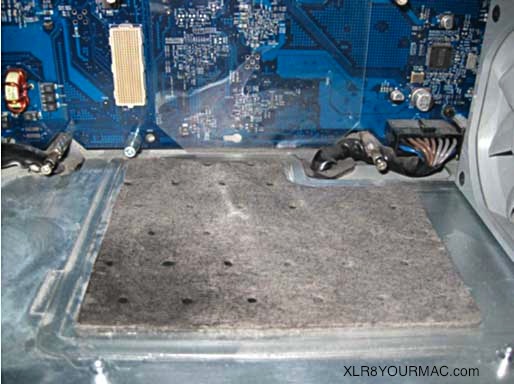
Figure 43. G5 Interior with CPU/LCS Removed 7/2/2010
47) Figure 44 is a closeup of the area between the CPU board and one of the LCS heat transfer modules. No "white rice" is present.
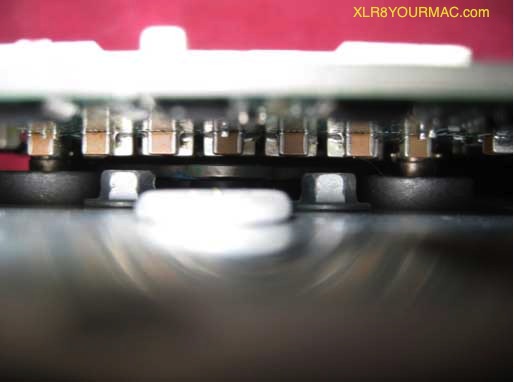
Figure 44. No White Rice 7/2/2010
48) Figures 45 and 46 are closeups of the bottoms of the heat transfer modules; no leak evident.
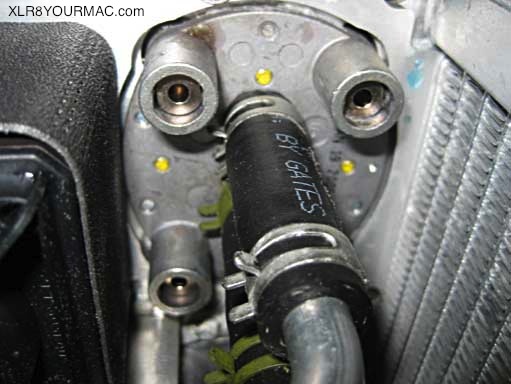
Figure 45. HTM 1 Close-up 7/2/2010
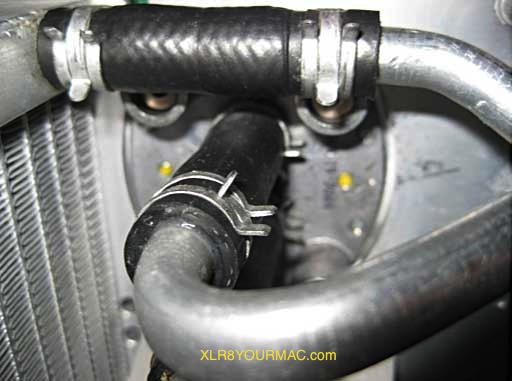
Figure 46. HTM 2 Closeup 7/2/2010
49) Figure 47 is a closeup of the coolant pump. Again, no evidence of a leak. The down-pointing arrow at the pump output port indicates coolant flow direction.
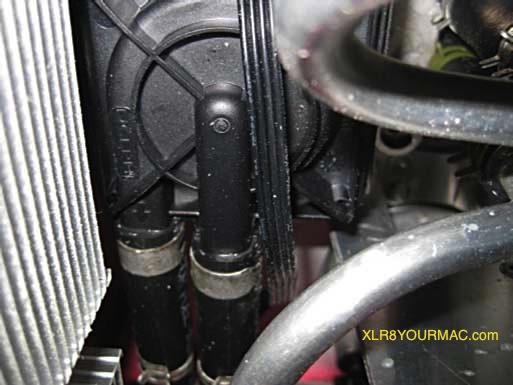
Figure 47. Coolant Pump 7/2/2010
50) Warning: Do not attempt to unscrew the large 17mm hex into which the Schrader valve is mounted! The valve itself may be removed, using a wrench on the large hex to prevent movement while unscrewing the valve, but if the 17mm hex turns, its coolant seal at the radiator will be broken. I found this out the hard way, and had to remove the large hex component from the radiator, leaving a hole. I tapped the hole with a 1/16"-27 NPT (tapered) pipe tap and installed a 1/16-27 pipe plug to reseal it. The result of this boondoggle is shown in Figure 48. (At least it's sealed again.) Also note that the valve's "nut" is not a "hex"; it is in fact an "oct," having 8 sides. Neither a 6-point nor 12-point socket will properly engage it; I used a small vise-grip. I advise leaving the Schrader valve assembly alone, although my repair did create a way to fill coolant to the very top without undoing any hoses.
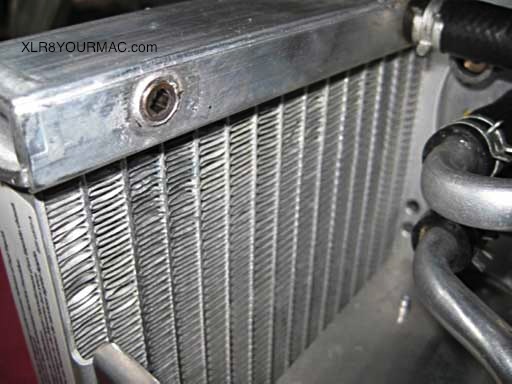
Figure 48. Pipe Plug Repair at Schrader Valve Location 7/2/2010
51) Since the "ifixit" instruction said to remove the intake fan assembly, I attempted that. On my G5, however, the fan's power plug cable is routed such that I could not retrieve it to fully remove the fan. It's the connector up in the top right hand corner of Figure 49. So I just put the fan assembly back in place. There is no problem (on my computer) removing/replacing the CPU/LCS with that fan assembly installed.

Figure 49. Fan Connector in Upper Right Corner 7/2/2010
52) Lessons Learned After 7/2/2010 Inspection
a) The Viton O-rings have proven reliable.
b) The replacement hoses have not leaked so far.
c) Thermal grease is not as good as a thermal pad.
d) I could not find any evidence of a leak anywhere in the LCS.
e) There appeared to be very little air in the LCS coolant system. (I refilled it after the pipe plug repair by filling it through the tapped hole, with the unit tipped enough to move the radiator air bubble up to that hole.)
f) The CPU/LCS assembly mounting screws should not be tightened past the point where the split standoffs are slightly expanded by the tapers on the mounting screws.
g) The Schrader valve assembly is somewhat delicate and should not be disturbed.
h) The intake fan assembly is best left in place.
53) All in all the LCS is not all that hard to deal with, as long as all operations are done with care. Hopefully this computer is better off for having Viton O-rings in the heat transfer modules. Also, periodic inspections as recommended by Mike at "XLR8YourMac" on the original page of PowerMac G5 Coolant Leaks/Repair Reports should help prevent catastrophic damage in the future due to coolant leakage.
-Bill S.
Index of PowerMac G5 LCS Repair Article
Page 1 | Page 2 | Page 3 | Page 4 | Page 5 | Page 6
|
