[Preface: As mentioned before here in articles/posts on putting faster graphics cards in the G4 Cube, there is a fit problem if the Graphics card board height isn't lower than the top edge of the standard AGP card end bracket. To date (fall 2002), the fastest graphics card that will fit the cube without mods is the OEM GeForce3 (but you should still add an 80mm fan in the Cube case bottom for cooling in my opinion.) In this article Kent Kanja shows how he moved the Cube's power supply board to allow installing the ATI Radeon 8500 card. (And had to nibble/cut a small section of the 8500 card's corner for clearance.). This article is not meant as a step-by-step guide, but just a series of photos on the mods Kent made.]
As you know the Radeon 8500 card is TOO TALL to (normally) fit in a Cube. I have accounted for this by using an extender cable for the DC-Power converter board. My plan is to relocate the power converter board to another location in the Cube so that cards as tall as the Radeon 8500 can be put in my Cube in the future.
I moved the power supply board to the place I wanted to - right between the hard drive and the CD/DVD-ROM drive. I insulated the
parts of the drive cage that the power supply board might touch and mounted the board to the cage with a cable tie and a bent paper clip (see photos below).
The stock IDE power cable was barely long enough to reach the hard drive, but it works.
The hardest part would have to be the 30-pin male to 30-pin female ribbon cable - especially since I couldn't find any 30-pin headers (even at Jameco). The ribbon cable I used was approximately 9 inches long. (I think I could have done just fine with a little less). I settled for 40-pin headers - I removed pins from the side with the pins and trimmed down the other side to the correct size. Of course I needed to reinforce both headers after modifying them, so I used thin pieces of plastic and Tak Pak epoxy. (I also had to remove some of the housing from the side with the pins since the connector on the power supply board is flush sideways with the printed circuit board).
In retrospect, instead of using double-row ribbon cable connectors, it would probably have been easier to use multiple single-row connectors with 30 individual wires. Live and learn.
Since I was routing power lines around the Cube, I chose to run my ribbon cable down to the base of the cube and under the heat sink, next to the fan - which left the header in just the right place to go under the drive cage and connect to the power supply board.
The wide photo below shows the heights of a (stock) Rage 128, Radeon 8500, and GeForce 2MX AGP graphics cards side-by-side. (note the height of the 8500 card, which requires moving the Cube PS board to fit.)
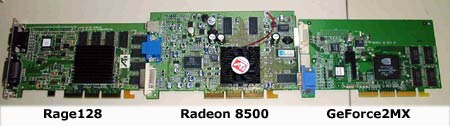
Comparing 3 Graphics Card Sizes
(The photo below shows the PS board moved from it's original position, where the ribbon extender cable is now attached.)
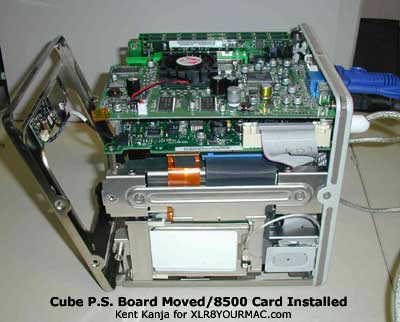
Photo Showing Extender Cable Where PS Board Normally Mounts
(To move the Power Supply board, a 30-pin ribbon extender cable had to be custom made to allow moving the board away from the top surface.)
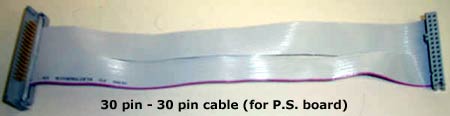
My 30pin to 30pin extender cable
(appx 9" long)
(Note - a reader later sent an email saying that he found 30-pin IDC connectors at cablesandconnectors.com.)
Cable Update: (Fall 2002 info) A reader sent a note that cablesandconnectors offered a pre-made 30pin cable, but Ken Kanja later commented on the cable they sell:
"Saw the photo of the cable but wanted to point out one thing... the male end of the cable still needs modification to fit the female connector on the DC-DC board.
Since the DC-DC board has a right-angle connector mounted flush with the circuit board, a portion of the male connector's housing will need to be cut/shaved/snapped off.
Just FYI.
Regards,
Kent Kanja (MiM)"
I'm assuming it's their P/N 20276 cable, but verify this before ordering.-Mike
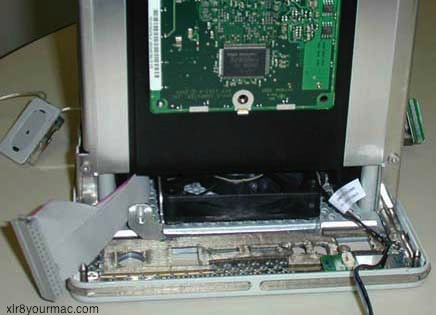
The photo below shows the Cube without drive cage, logic board and fan. 30 pin cable is under heatsink.
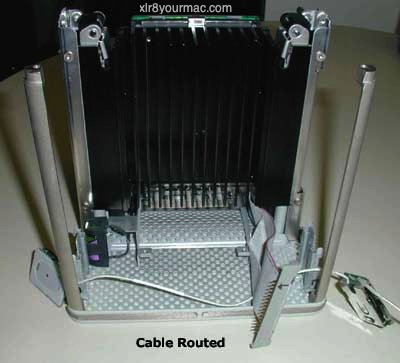
Stipped Cube Core Housing with Cable Routed
Side view of the above:
Side View of Stripped Core with Cable Routed
The photo below shows a reverse view of above photo
(after I put the 80mm fan back in).
Reverse View of Stripped Core with Fan Installed
(Note: to remove the drive cage you have to remove the two Airport antenna nodes, as there's one screw behind each of them that has to be removed. You can see one of the loose Antennas in the photo above to the left.)
Here's a photo of the Cube's CD/DVD drive [Notebook type]:
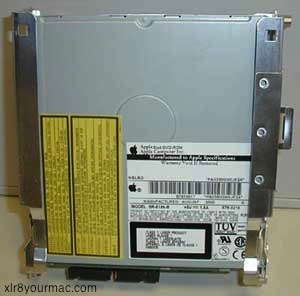
Cube CD/DVD-ROM Drive
The photo below shows the drive cage removed from the Cube, with the CD/DVD-ROM drive placed in it.
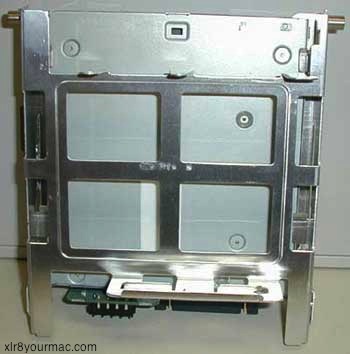
Drive Cage with CD/DVD-ROM Drive Mounted
The photo below shows the drive cage back in the Cube - with insulating tape covering the slanted area that the power supply board might touch. (Insulated to avoid potential short circuit.)
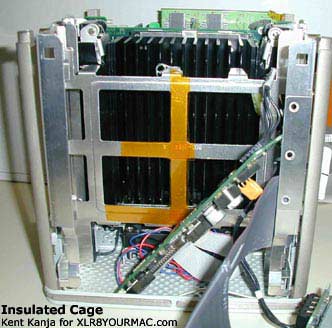
Insulated Drive Cage Reinstalled
Power Supply Board Retainer:
A paperclip, bent into a triangle with 2 loops at the ends - I used this, along with the nut and bolt to secure the top end (the end that wants a chassis ground) of the power supply board.
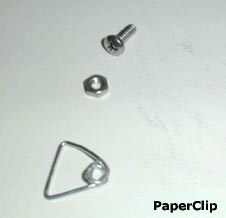
Modified Paperclip Retainer
Front shot of the power supply board mounted to the drive cage (notice the bolt at the top and the cable tie at the bottom).
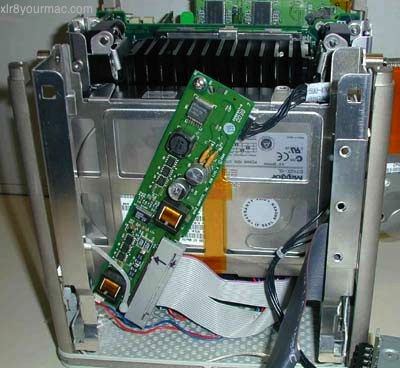
Power Supply Board Mounted
Same thing as above, but from the back (so you can see the bent paperclip).

Back View of Power Supply Board Mounting
Same thing again, with the CD/DVD-ROM drive back in place and from a top-down view
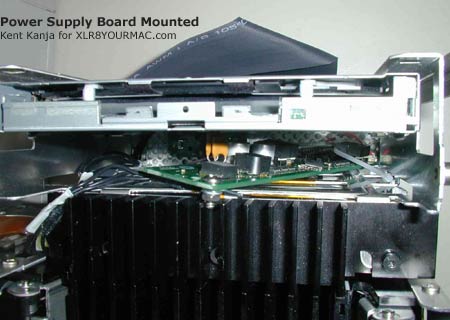
Top View of Power Supply Board Mounting
Radeon 8500 installed in the Cube (without the top plate connected)
Radeon 8500 Video card Installed
Unfortunately the "top/back" corner of the Radeon 8500 card didn't quite fit the top plate of the Cube, so I needed to take 1 nibble off of it (very
carefully). I covered the notch with special heat resistant insulator tape. (Note - take care when using a nibbler on circuit boards - if the cut is not clean and depending on the pwb design/layers - you could 'smear' copper from one layer to another, causing a short circuit. That depends on the artwork (layer design) of the board. Kent did not have this problem with the area he cut on the 8500 card however, but just a general FYI.-Mike]
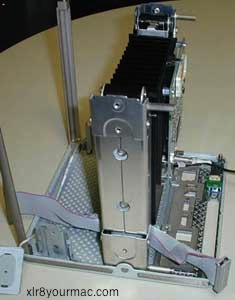
A top-down view of everything attached except the top plate.
(Note: there is a post that the original Rage 128 card and GeForce 2MX card used to be connected to on their top corners. This post also had a grounding bracket that contacted the corner of the power supply board. I removed the screw from this post, but left the post itself in place - after covering the end of the post with a spongey (non-conductive) tape. This spongey tape is visible in the photo below.)
Top View of Core with Radeon 8500 video card
(top plate off)
The Photo below shows the Cube put back together (shows the 30pin cable connected to the logic board - also shows how the Radeon 8500 barely fits the slot in the top plate of the Cube)
Assembled Core with Radeon 8500 video card (Angle View)
Other Notes:
[I asked Kent about the using the original Cube graphics card end plate (which has ADC and VGA ports only, no video out port and the spacing doesn't fit some cards like the 7500 Radeon, but does work with GF2MX, Rage128, Radeon and Geforce 3 OEM Mac cards.-Mike]
The Radeon 8500 connectors fit through the original end bracket, however only one of the DVI connector's screw down posts can be attached. (I did not cut my end bracket - instead I just use my DVI connector with only one post). I might have to trim the slot in the bracket a bit if I want to uses-video - the s-video port is very close to the rounded end of the slot in
the bracket.
-Kent

View of Installed Radeon 8500 card Connectors
Other Cube Related Articles:
The Mac Mods/Upgrades page has articles on Mac Pros, Mac mini, iMac, Macbook Pro, and PowerMac G5.
| 